
How to Stain/Paint Your Crochet
a Tutorial by: Lisa Jelle-Kaleidoscope Art & Gifts

When designing my Charming Cherry Blossom collection I found myself disappointed with the impact of colors on the overall feel of the blossoms. I just couldn't find the right color thread that embodied the delicacy, fragility and quiet elegance cherry blossoms as they're found in nature. I racked my brain for some technique I could use to highlight these small, fleeting symbols of renewal, karma and life. I recalled a project I had taught locally where we had used permanent markers in various colors on t-shirts and then applied rubbing alcohol to give the colors a water colored or tie-dyed look to them. I remember being impressed with how vibrant and striking the colors remained even after applying the alcohol. So I thought "I wonder if this would work on my cherry blossoms". And guess what, it worked MARVELOUSLY! This technique can be applied to any finished crocheted or knit piece to give it a unique hand touched finish. The ink works best on natural fibers. You're limited only by your own imagination on this. Enjoy yourself!
Supplies needed
- Finished piece (See fiber notes at end of this tutorial. I used #10 cotton crochet thread for my blossoms)
- Permanent markers (I use Sharpies because of the wide range of colors available)
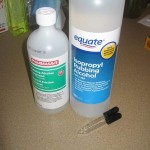
- Rubbing alcohol
- Plastic syringe, medicine dropper or Q-tip (you can get a small dropper or plastic syringe for free from most pharmacies, the size used to administer children’s liquid meds)
- Paper plate or thick paper to protect surfaces

The process
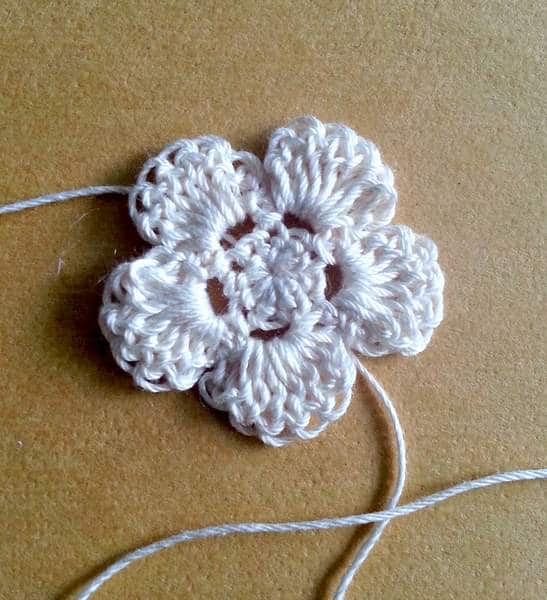
Start with your finished piece
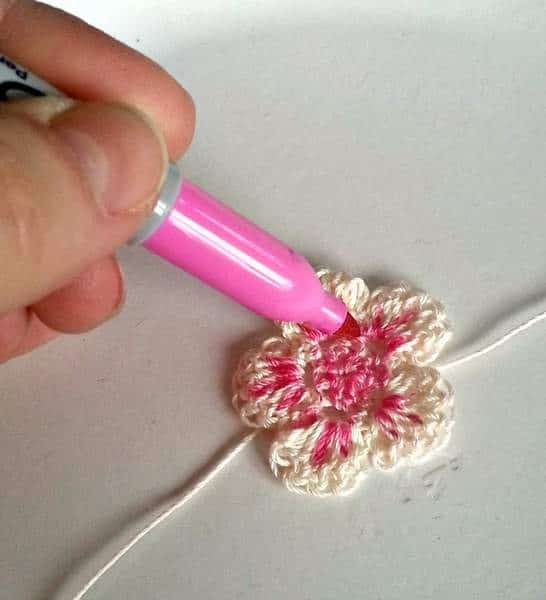
Apply permanent marker-Note: intensity of color will lessen after you apply the alcohol in next step, start small (less is more) and add more color later if you’d like it brighter or darker.
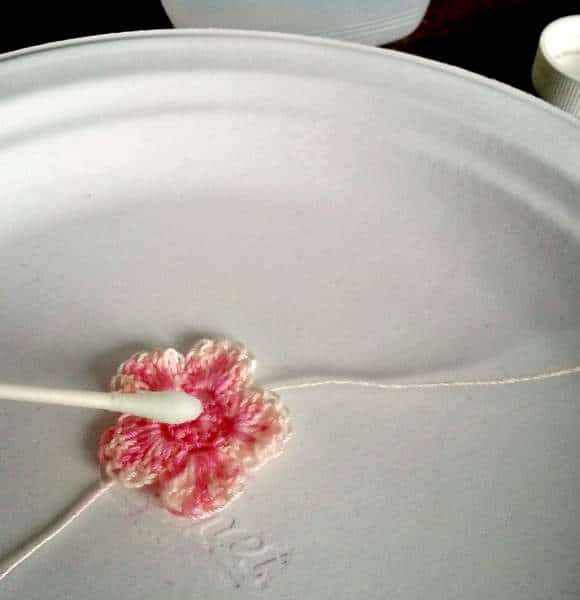
Apply alcohol with Syringe/Dropper/Q-tip-Note: you can’t really add TOO much. The more alcohol you add, the more likely the ink will disperse ‘watercolor’ style.
 Optional- add more details, color and/or alcohol to get the effect you like. Note: overall colors will lighten up when piece has dried completely.
After piece has dried completely rinse in warm water to remove excess color and alcohol residue. Allow to completely dry before attaching to any items (especially light colored items) in case there is any residual color.
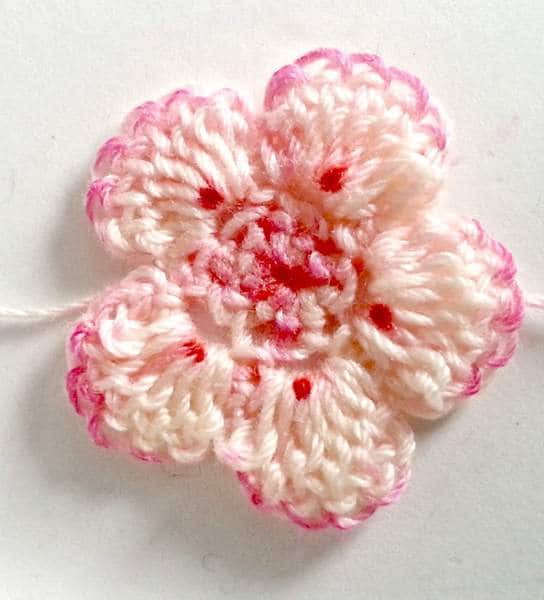
Ready to attach/use

appliques, freehand ‘paint’ on a hat, blanket, wall hanging. Your imagination is the limit! I hope you enjoyed this tutorial. If you have any questions, feel free to contact me.
I have written this tutorial and am publishing it for free to all, however, if you sell any items you create that include this technique please credit me as the tutorial’s author. Please also follow the Golden rule and do not copy, sell or distribute this tutorial AS YOUR OWN.
You can find my Charming Cherry Blossom Collection of crochet patterns HERE
Thanks and enjoy!

I love this. What a great idea. I've been looking for something to make my crochet projects extra special. I make all the Christmas gifts for my kids and grandkids and greAt grand children now. Thank you for sharing
ReplyDelete